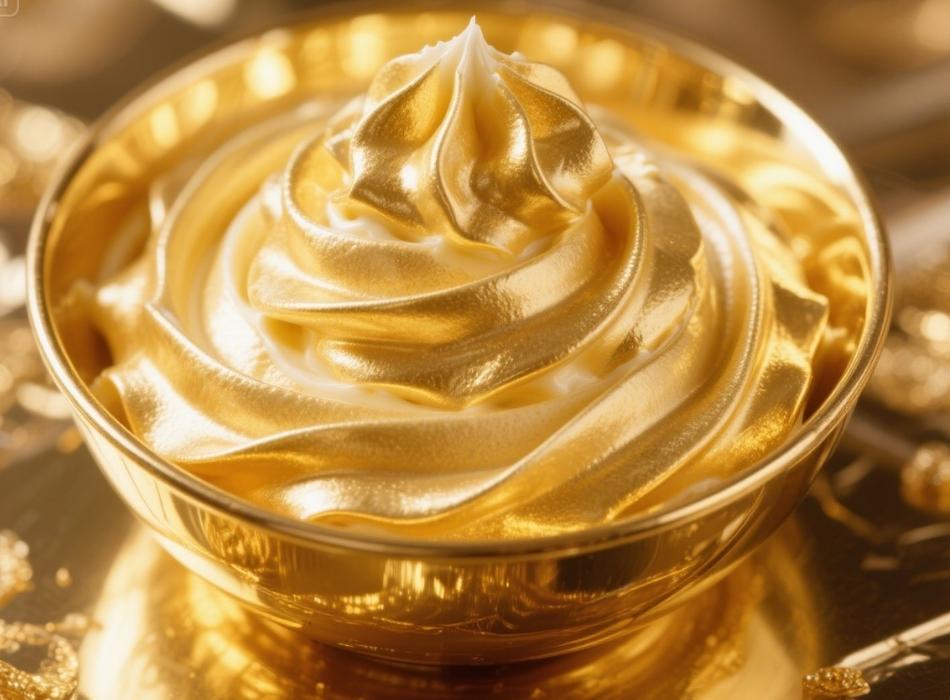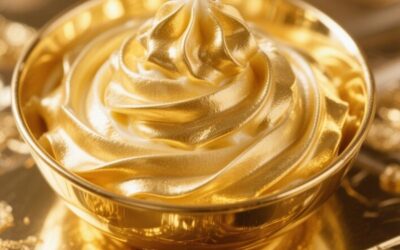
Gold buttercream frosting transforms ordinary cakes into show-stopping centerpieces worthy of the most elegant celebrations. Whether you’re crafting a wedding cake, birthday surprise, or holiday dessert, mastering this luxurious frosting technique will elevate your baking game to professional levels.
This comprehensive guide walks you through everything you need to know about creating stunning gold buttercream frosting. You’ll discover multiple methods for achieving that perfect golden hue, learn professional techniques for smooth application, and troubleshoot common issues that can derail your decorating dreams.
From selecting the right gold coloring agents to perfecting your piping skills, we’ll cover the essential steps that separate amateur attempts from bakery-quality results. By the end of this post, you’ll have the confidence and knowledge to create breathtaking gold buttercream that looks as amazing as it tastes.
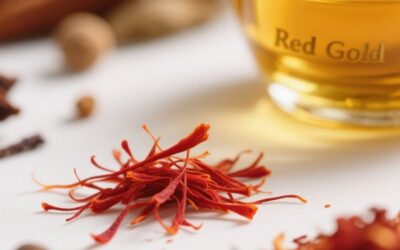
Understanding Different Types of Gold Coloring
Creating beautiful gold buttercream starts with choosing the proper coloring method. Each approach offers distinct advantages and produces different visual effects.
Gel Food Coloring
Gel food coloring provides the most control over your gold buttercream’s intensity. These concentrated colors won’t thin your frosting like liquid alternatives, making them ideal for maintaining the perfect consistency.
Start with yellow gel coloring as your base, then add tiny amounts of orange or brown to create depth. The key lies in building color gradually—you can always add more, but removing excess coloring proves nearly impossible.
Mix thoroughly between additions, allowing the color to fully distribute before evaluating whether you need more. This patient approach prevents the common mistake of adding too much coloring at once.
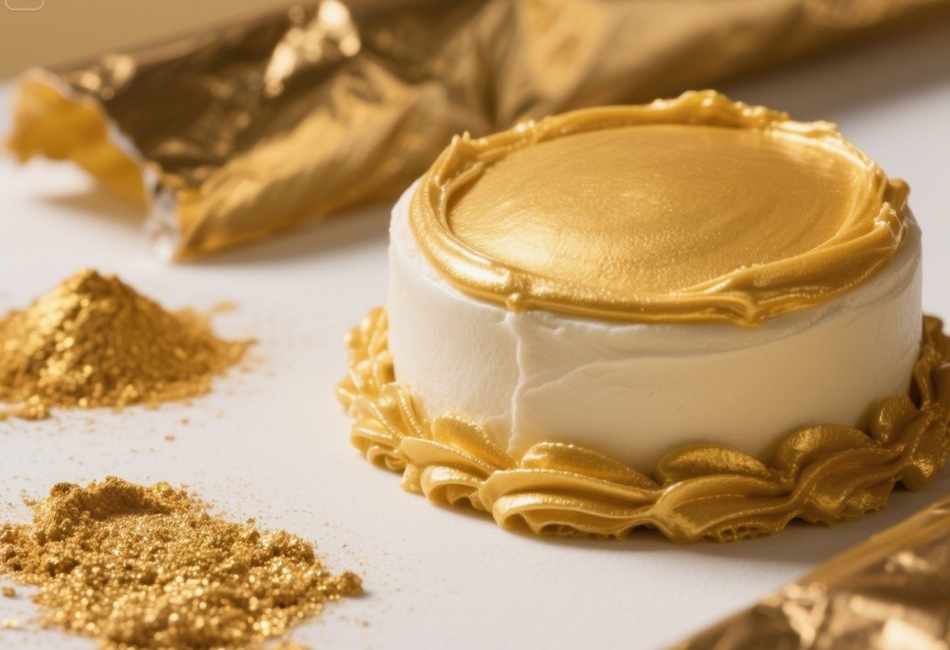
Luster Dust and Pearl Dust
Luster dust creates the most authentic metallic gold appearance. This edible powder catches light beautifully, producing that coveted shimmer effect that makes gold buttercream so appealing.
Mix luster dust with a small amount of extract or vodka to create a paintable paste. Apply this mixture to already-frosted surfaces using a clean brush for targeted gold accents, or incorporate it directly into your buttercream for overall golden color.
Pearl dust offers a subtler effect than luster dust. It provides gentle shimmer without overwhelming metallic intensity, perfect for elegant applications where you want sophistication over drama.
Gold Leaf Application
Edible gold leaf represents the ultimate luxury option. These delicate sheets create a stunning visual impact but require careful handling and specific application techniques.
Apply gold leaf only after your buttercream has set slightly. The frosting surface should feel tacky but not wet. Use a clean, dry brush to gently transfer leaf pieces onto your cake, pressing lightly to ensure adhesion.
Essential Ingredients for Perfect Gold Buttercream
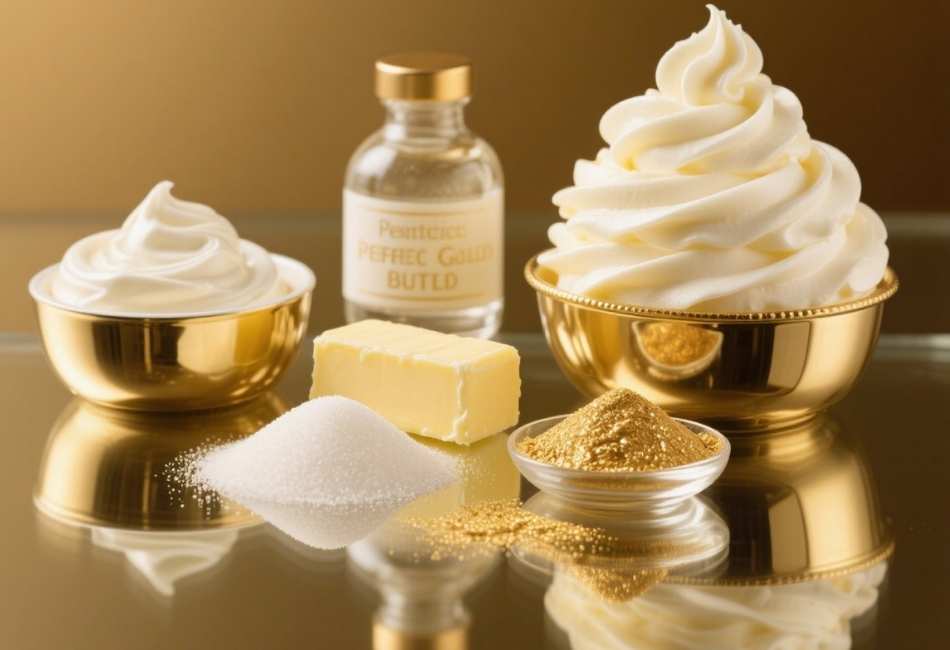
Quality ingredients form the foundation of exceptional gold buttercream frosting. Each component plays a crucial role in achieving the ideal texture, flavor, and appearance.
Butter Selection and Preparation
Use unsalted butter for the best flavor control. European-style butter, with its higher fat content, creates exceptionally smooth and rich buttercream that holds gold coloring beautifully.
Allow butter to reach room temperature naturally—this typically takes 2-3 hours, depending on your kitchen’s temperature. Properly softened butter should yield slightly to pressure but maintain its shape. Overly soft or melted butter will create unstable frosting that’s difficult to pipe and color.
Cut butter into cubes before beating to ensure even mixing. This simple step prevents lumpy texture and helps achieve the smooth consistency essential for professional-looking results.
Powdered Sugar Considerations
Sift powdered sugar before adding it to your butter. This extra step eliminates lumps that can create a grainy texture in your finished frosting. Lumpy buttercream won’t hold gold coloring evenly, resulting in a streaky or uneven appearance.
Add powdered sugar gradually, alternating with small amounts of liquid ingredients. This technique prevents the “powdered sugar explosion” that coats your kitchen and ensures smooth incorporation.
Flavor Enhancers
Vanilla extract complements gold coloring beautifully, but consider almond extract for more sophisticated flavor profiles. Start with half the amount you’d typically use with vanilla, as almond extract’s intensity can quickly overpower other flavors.
Heavy cream or milk helps achieve the perfect piping consistency. Add liquid gradually—you can always incorporate more, but fixing overly thin buttercream requires additional powdered sugar, which can dull your carefully crafted gold color.
Step-by-Step Gold Buttercream Recipe
This master recipe creates enough frosting for one standard two-layer cake or 24 cupcakes.
Ingredients
- 1 cup (2 sticks) unsalted butter, room temperature
- 4 cups powdered sugar, sifted
- 1/4 cup heavy cream or milk
- 2 teaspoons vanilla extract
- 1/4 teaspoon salt
- Yellow gel food coloring
- Small amount of orange or brown gel coloring
- Gold luster dust (optional)
Method
Begin by beating softened butter with an electric mixer on medium speed for 3-4 minutes until light and fluffy. This initial beating incorporates air, creating the smooth texture that makes buttercream so appealing.
Add half the sifted powdered sugar, beating on low speed until just combined. Pour in half the cream and all the vanilla extract, then beat until smooth. Add remaining powdered sugar gradually, alternating with remaining cream until you achieve the desired consistency.
The finished buttercream should hold its shape when piped but spread smoothly when applied with an offset spatula. If it’s too thick, add cream one tablespoon at a time. If too thin, incorporate additional powdered sugar gradually.
Adding Gold Color
Start coloring with yellow gel food coloring. Add just a few drops initially—gel colors are much more concentrated than liquid alternatives. Beat thoroughly and assess the color before adding more.
Once you achieve a warm yellow base, add tiny amounts of orange gel coloring to create depth. A toothpick tip’s worth is often sufficient. For richer gold tones, add an even smaller amount of brown coloring.
If using luster dust for metallic effects, add it gradually while beating. Start with 1/4 teaspoon and increase as needed to achieve your desired level of shimmer.
Professional Techniques for Smooth Application
Achieving bakery-quality results requires mastering specific application techniques that professional decorators use daily.
Temperature Control
Room temperature affects both your buttercream’s consistency and your ability to work with it effectively. Ideal working temperature ranges between 68-72°F (20-22°C).
If your kitchen runs warm, chill your frosted cake briefly between decorating steps. This prevents melting and helps maintain clean piping lines. Conversely, if your buttercream becomes too stiff, let it warm slightly before continuing.
Crumb Coating Foundation
Apply a thin crumb coat before your final gold buttercream layer. This initial coating traps cake crumbs and creates a smooth base for your decorative frosting.
Use an offset spatula to apply a thin layer of buttercream across the entire cake surface. Don’t worry about perfection at this stage—focus on coverage and crumb control. Chill the crumb-coated cake for 30 minutes before applying your final gold layer.
Final Layer Techniques
Apply gold buttercream generously for your final coat. More frosting makes achieving smooth results easier than trying to stretch thin applications.
Hold your offset spatula at a 45-degree angle to the cake surface. Apply steady, even pressure while rotating your cake turntable smoothly. This technique creates the seamless finish that distinguishes professional work from home baking attempts.
For perfectly smooth sides, use a bench scraper instead of an offset spatula. Hold the scraper steady while rotating the turntable in one continuous motion.
Piping and Decorating with Gold Buttercream
Gold buttercream’s visual impact multiplies when applied through skilled piping techniques. These methods transform simple frosting into artistic masterpieces.
Piping Bag Preparation
Fill piping bags appropriately to ensure consistent results. Twist the top of the bag tightly to prevent frosting from backing up while you work. Support the bag’s weight with your non-dominant hand while guiding with your dominant hand.
Choose appropriate tip sizes for your desired effects. Large star tips create dramatic rosettes and borders, while smaller round tips work perfectly for detailed writing and delicate decorative elements.
Rose and Flower Techniques
Gold buttercream roses add elegant sophistication to any cake. Start with a small cone of frosting at your piping tip, then build petals gradually from the center outward.
Keep your piping pressure consistent and rotate your flower nail smoothly. This coordination creates even petal shapes that look natural and professional. Practice on parchment paper before decorating your final cake.
For smaller flowers, use leaf tips to create quick rosebud shapes. These require less time and skill while still providing beautiful golden accents.
Border and Edge Work
Gold borders frame your cake beautifully and hide any imperfections along the edges. Shell borders work universally well and suit most cake styles and occasions.
Practice consistent pressure and spacing on parchment paper before working on your cake. Muscle memory develops quickly with repetition, and you’ll soon pipe professional-looking borders instinctively.
Troubleshooting Common Gold Buttercream Issues
Even experienced bakers encounter challenges when working with colored buttercream. Understanding common problems and their solutions saves time and frustration.
Color Problems
Muddy or dull gold coloring usually results from adding too much brown or using poor-quality food coloring. Start over with fresh buttercream if the color becomes unsalvageable—trying to fix poorly colored frosting often makes matters worse.
Streaky coloring indicates insufficient mixing. Beat the buttercream longer, scraping bowl sides frequently to ensure even color distribution. Sometimes coloring needs several minutes to incorporate fully.
Texture Issues
Grainy buttercream typically stems from powdered sugar that wasn’t properly sifted or butter that was too cold during mixing. Prevention works better than attempted fixes—always sift powdered sugar and ensure proper butter temperature.
If graininess develops, try beating the buttercream longer. Sometimes, extended mixing smooths texture issues. For persistent problems, strain the buttercream through a fine-mesh sieve.
Consistency Problems
Too-thick buttercream won’t pipe smoothly or spread evenly. Add cream or milk one tablespoon at a time, beating thoroughly between additions. Patience prevents accidentally thinning the mixture too much.
Overly thin buttercream won’t hold piped shapes or maintain clean edges. Add powdered sugar gradually, remembering that additional sugar may lighten your carefully achieved gold color.
Storage and Make-Ahead Tips
Proper storage extends your gold buttercream’s usability and maintains its beautiful appearance.
Short-Term Storage
Cover gold buttercream tightly at room temperature for up to 2 days. Plastic wrap pressed directly onto the surface prevents skin formation and color changes.
Re-beat stored buttercream briefly before using to restore smooth texture. Room temperature frosting pipes and spreads more easily than chilled alternatives.
Long-Term Storage Options
Refrigerate gold buttercream for up to one week or freeze for up to three months. Bring to room temperature gradually and re-beat before use to restore proper consistency.
Freezing can slightly affect color intensity. Test a small batch first if color matching is critical for your project.
Make-Ahead Strategies
Prepare gold buttercream up to two days in advance for optimal freshness and color stability. This timing allows you to focus on cake assembly and final decorating without rushing through frosting preparation.
Store piped decorations separately on parchment paper, then transfer to your cake just before serving. This technique prevents damage and maintains crisp detail work.
Take Your Gold Buttercream to the Next Level
Mastering gold buttercream frosting opens doors to countless decorating possibilities. The techniques and tips covered in this guide provide the foundation for creating stunning cakes that impress guests and satisfy your creative ambitions.
Remember that practice builds confidence and skill. Start with simple applications and gradually work toward more complex decorating techniques. Each cake you create teaches valuable lessons that improve your next attempt.
Consider experimenting with different gold shades and metallic effects once you’ve mastered the basics. Rose gold, champagne gold, and antique gold variations each offer unique visual appeal for various occasions and styles.
Your journey toward buttercream mastery begins with your next cake. Gather your ingredients, prepare your workspace, and start creating the golden masterpiece you’ve been dreaming about.