How to Make a Pink Drink at Home?  

The iconic Pink Drink isn’t just a staple for Instagram-worthy shots—it’s a vibrant and refreshing beverage that delights the palate. Originally made famous by Starbucks, this tropical, creamy concoction has captured the attention of beverage enthusiasts everywhere. But what if you could skip the line (and save some cash) by making your very own Pink Drink at home?  

I’ll teach you how to recreate this beloved drink with simple, healthy ingredients in this guide. Whether you’re a home mixologist, a health enthusiast, or someone who loves experimenting in the kitchen, you’ll find everything you need to perfect the Pink Drink right in your home.  

What is the Pink Drink?  

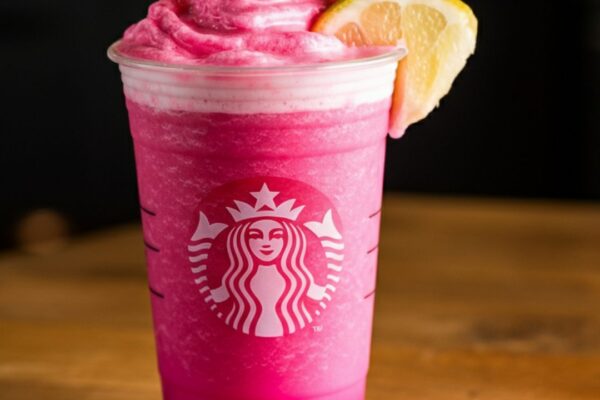
Before we get started, what exactly makes the Pink Drink so unique? Starbucks’ Pink Drink is part of their “Refresher” series and features a vibrant pink hue that screams tropical paradise. It’s made with their Strawberry Açaí Refresher, combined with coconut milk and natural fruit for a creamy, fruity flavor that’s just the right balance of sweet and tangy.  

The drink is customizable, based on your preferred levels of sweetness or milk substitutes, which makes it highly popular among those keen on personalizing their beverages.  

Ingredients for the Perfect Pink Drink  

What is the best part about making a pink drink at home? You control the ingredients! There are no hidden sugar bombs or processed syrups here—just fresh, wholesome goodness. Here’s what you’ll need to get started:  

Basic Ingredients  

Unsweetened Coconut Milk (½ cup): Provides the creamy, tropical base for the drink.  

Brewed Hibiscus or Berry Tea (1 cup, chilled): Acts as the pink-hued liquid base and brings out the fruity flavor. You can use tea bags like Tazo Passion or any berry herbal tea blend available at your grocery store.  

White Grape Juice (2-3 tablespoons): Add subtle sweetness to mimic the Strawberry Açaí Refresher base.  

Fresh or Freeze-Dried Strawberries (1-2 tablespoons): For added texture and to bring the essence of strawberries to the forefront.  

Optional Ingredients to Enhance Flavor  

Honey or Maple Syrup (1 teaspoon): For those who prefer a slightly sweeter drink.  

Vanilla Extract (½ teaspoon): Complements the creamy coconut milk and adds depth to the flavor profile.  

Açaí Powder (¼ teaspoon): Boosts flavor and nutrition! Perfect for those who want that authentic “refreshing” twist.  

Step-by-Step Guide to Making Pink Drink Magic  

You don’t need advanced barista skills to do this—follow these simple steps, and you’ll have a glass of Pink Drink ready in no time.  

Step 1: Brew Your Tea Base  

Start by brewing 1 cup of hibiscus or berry tea. Once brewed, leave it to cool completely. If you’re in a rush, pop it in the fridge or add ice cubes to speed up the process.  

Step 2: Combine the Liquid Ingredients

Grab a pitcher or large glass. Pour in the chilled hibiscus tea, unsweetened coconut milk, and white grape juice. Stir gently to mix the ingredients. Pro tip? Add the coconut milk last to see that gorgeous pink swirl come to life as it blends with the tea.  

Step 3: Adjust Sweetness  

Taste your mixture. If it’s not sweet enough, drizzle in honey or maple syrup and stir again. Remember, less is more—you can always add more sweetness, but you can’t take it out!  

Step 4: Add the Strawberries  

Toss in a handful of freeze-dried or freshly sliced strawberries. They add flavor and make your drink look even more vibrant and Instagram-worthy.  

Step 5: Serve Over Ice  

Fill a tall glass with ice and pour your prepared Pink Drink mixture over it. Stir gently to distribute the fruit pieces, and voila! You now have a homemade Pink Drink that rivals the Starbucks original.  

Step 6 (Optional): Garnish & Serve with Style  

For that extra touch, garnish your drink with a slice of fresh strawberry, a sprig of mint, or even a dash of edible glitter. Why not? It’s your drink—make it memorable!  

Why Make the Pink Drink at Home?  

Sure, swinging by your local Starbucks might sound convenient, but here are some undeniable perks of crafting this treat at home:  

Cost-Effective: On average, making a Pink Drink at home costs less than half the price of buying one at Starbucks.  

Health Control: You choose no unnecessary sugar or artificial coloring ingredients.  

Customizable: Adjust the sweetness, creaminess, and fruitiness to suit your taste.  

Eco-Friendly: Skip the disposable cups and straws—your glass is better for the planet.  

Creative Freedom: Experiment with raspberries, blueberries, or even a dash of rosewater for a floral twist.  

Tips for the Perfect DIY Pink Drink  

Chill Everything: To avoid a watered-down drink, chill your tea, milk, and grape juice before mixing.  

Experiment With Milk Options: Do you prefer something other than coconut milk? Try almond, oat, or even cashew milk—they’ll each bring a slightly different flavor.  

Jazz It Up: Turn your drink into a sparkling version by adding sparkling water or soda splash.  

The Health Benefits of the Pink Drink Ingredients  

This drink tastes amazing, and many core ingredients also have health perks.  

  1. Hibiscus Tea is rich in antioxidants and may help lower blood pressure.  
  2. Coconut Milk provides healthy fats that can boost energy and promote a feeling of fullness.  
  3. Açaí Powder is loaded with antioxidants that can support overall health and wellness.  
  4. Strawberries offer a dose of vitamin C and fiber, perfect for supporting your immune system.  

Share the Love  

One of the best parts about making a Pink Drink at home is sharing it with friends and family. Whip up a batch for your next brunch or backyard picnic, and watch as your guests rave about its colorful presentation and refreshing taste. Don’t forget to snap a few pictures for Instagram—your homemade Pink Drink will surely get all the likes!  

Ready to Start Brewing?  

Making a Pink Drink at home is easier than you think. With a handful of ingredients and a few minutes, you can recreate this iconic beverage in your kitchen—no barista required.  

Have you got any unique twists or secret ingredients for your Pink Drink recipe? Could you share them in the comments below? Happy sipping!  

Final Step: Enjoy Your Creation

Now that your Pink Drink is ready take a moment to appreciate your handiwork. Admire the vibrant color and the delicate swirl of coconut milk. Enjoy the refreshing taste, knowing you crafted it with skill and care. Sit back, relax, and indulge in the flavorful blend of creamy coconut, sweet strawberries, and tangy tea. Whether savoring it alone or sharing it with friends, your homemade Pink Drink is a delightful treat for any occasion. Cheers to your DIY success!

When Can I Drink Coffee After a Tooth Extraction?  

A warm cup of coffee can be one of life’s simplest pleasures, but if you’ve recently had a tooth extraction, you may wonder if indulging in your favorite brew is safe. Coffee lovers, don’t worry—we’re here to guide you through the dos and don’ts of sipping coffee post-procedure, ensuring a smooth recovery while satisfying your caffeine cravings.  

Why Do You Need to Wait Before Drinking Coffee?  

Before we get into the specifics, it’s essential to understand why timing is critical after a tooth extraction. Tooth extraction leaves an open wound in your mouth, requiring time to heal correctly. The healing process involves the formation of a blood clot at the extraction site, serving as a protective layer that prevents infection and promotes the growth of new tissue.  

Drinking coffee—or any hot beverage—too soon can create complications. Here’s why:  

Heat and Dislodged Blood Clot: Hot beverages can dissolve or dislodge the blood clot, a condition called dry socket. This painful complication can delay healing and require further treatment.  

Caffeine and Increased Blood Flow: Caffeine increases blood pressure and blood flow, which may lead to excessive bleeding at the extraction site.  

Acidic Properties of Coffee: Coffee is naturally acidic, irritating the wound and potentially slowing healing.  

While waiting might be challenging for caffeine enthusiasts, giving the extraction site enough time to heal is vital for a fast and pain-free recovery.  

When Is It Safe to Drink Coffee After a Tooth Extraction?  

Day 1 (The Critical Period): Avoid coffee entirely. Stick to cold or lukewarm water and soft foods to ensure the extraction site remains undisturbed.  

Day 2-3 (The Cautious Phase): Hold off on coffee, scalding coffee. If you must have coffee, consider iced or cold brew options to avoid the risks associated with heat.  

Day 4 and Beyond: If you’re healing well and have no complications by the fourth day, you may start to reintroduce lukewarm (not hot) coffee into your diet. Make sure to sip slowly and avoid drinking through a straw, which creates a suction that can dislodge the blood clot.  

Full Recovery: For most individuals, the extraction site will have healed significantly within 1–2 weeks. You can safely resume drinking coffee at your preferred temperature—unless instructed otherwise by your dentist.  

Factors That May Affect Your Timeline  

While the above timeline applies to most people, several factors can influence when it’s safe to enjoy coffee again after a tooth extraction.  

Complexity of the Extraction  

A simple extraction may heal faster than a surgical extraction, such as for impacted wisdom teeth. For complex procedures, your dentist may advise avoiding coffee (and hot beverages) for extended periods.  

Your Body’s Healing Process  

Everyone heals at a different pace. If you’re a fast healer and follow post-op instructions carefully, you may return to coffee within a week. If healing is slow, you’ll need to be more patient.  

Risk of Dry Socket  

Suppose your dentist identifies you as being more susceptible to dry sockets (e.g., smokers and women on hormonal contraceptives have a higher risk). In that case, you may need to avoid coffee and other irritants for an extended time.  

Your Regular Coffee Habits  

After the extraction, those who consume large amounts of coffee daily may experience caffeine withdrawal symptoms, such as headaches and fatigue. If this applies to you, talk to your dentist about alternate options like decaffeinated tea or iced decaf coffee while your extraction site heals.  

Tips for Satisfying Your Coffee Cravings During Recovery  

If skipping coffee isn’t an option for you, here are ways to stay caffeinated without risking your recovery:  

Opt for Iced Coffee: During the first week, stick to iced or cold-brew coffee. Cold beverages are less likely to disrupt blood clot formation.  

Dilute Your Coffee: Mix your coffee with milk or water to minimize its acidic properties and reduce irritation.  

Avoid Straws: Drink directly from the cup to prevent suction that could dislodge the blood clot.  

Try Herbal Coffee Alternatives: Explore non-caffeinated alternatives like chicory root coffee or herbal teas to curb cravings.  

Stay Hydrated: Dehydration can worsen caffeine withdrawal symptoms. Drink plenty of water throughout the day to stay hydrated and aid healing.  

What to Avoid (Besides Hot Coffee)  

While coffee is just one part of the equation, you should avoid other items that could interfere with your recovery.  

Smoking: Smoking significantly increases the risk of dry sockets and delays healing. Avoid smoking for at least 48 hours, but ideally for longer.  

Carbonated Drinks: Soda and other carbonated beverages can irritate the wound.  

Alcohol: Alcohol can dehydrate your body, slow healing, and conflict with prescribed medications.  

Crunchy or Spicy Foods: These can irritate or get lodged in the extraction site.  

By avoiding these items and following your dentist’s advice, you’ll be setting yourself up for a smooth and speedy recovery.  

Final Sip of Advice  

Returning to your regular coffee routine after a tooth extraction requires patience, but giving your mouth time to heal will pay off in the long run. As a rule of thumb, wait until the extraction site has stabilized—typically four days to a week—before reintroducing coffee. Always consult your dentist if you’re unsure.  

Your smile deserves the best care you can give it, even if it means waiting a little while for that perfect cup of coffee. Take it slow, prioritize your healing, and enjoy that first sip once you’re clear—it’ll be worth the wait!

How Many Water Bottles Should You Drink a Day?

Hydration is the foundation of health and wellness, yet many people struggle to answer a simple question: How much water do we need daily?  

Still, you know that drinking water is essential. Sufficient daily water intake is vital to your health and well-being. The health benefits of plentiful water consumption are numerous, ranging from maintaining a healthy body temperature to weight loss to sufficient hydration and even avoiding constipation or, worse, health issues like kidney stones.  

So, how do you get enough water to adhere to the recommended daily water consumption without leaving an ugly impact on the planet?  

Fortunately, there are many ways to get the water you need in your daily regimen and take care of the planet.  

So, how much water should you drink, and should you concern yourself with water filtration or softening? These answers and more will follow.  

Why Hydration Matters

Fluid intake is vital to your survival — after all, your body is comprised of 60% water! The need for sufficient hydration is something humans share with all living things. 

Water is essential for your body’s basic functions. When you breathe and sweat, water helps regulate your body temperature. It also acts as a lubricant for the highway that carries nutrients through your bloodstream, and it helps your body rid itself of toxicants and waste through urine. H2O lubricates your joints, keeps your mouth moist, and balances electrolytes.  

It is interesting to know that your brain comprises approximately 80% water. Drinking plenty of water is necessary to keep your brain functioning correctly. Water will help boost your memory, regulate your mood, and positively impact your focus, decision-making capabilities, and energy levels.  

How Much Water Do You Need?  

The National Academies of Sciences recommends the following daily fluid intake:

Men: About 125 ounces (3.7 liters)

Women: About 91 ounces (2.7 liters)  

This includes all fluids, not just water—think tea, coffee, and even the water content in foods like fruits and vegetables.

For those who prefer to think in practical terms, that’s equal to about 6–8 standard 16-ounce reusable water bottles daily for women and 8–10 for men.

What is the way to get the water content you need? 

While drinking water daily is essential to get enough fluids into your body, a healthy adult meets most of their water content needs through healthy eating and drinking other fluids. 

Many fruits and vegetables have a high water content. Watermelon is a perfect example, but you may be surprised that eating apples, celery, lettuce, zucchini, cucumbers, bell peppers, tomatoes, and spinach, among other foods, will also increase your water intake.  

Still, experts suggest that plain water is best for our bodies (especially for maintaining a healthy weight) and that we can meet our water content needs by drinking extra water throughout the day.  

How Many Water Bottles Should You Drink a Day? 

Some sources suggest drinking roughly half your body weight in equivalent ounces of water is the best way to meet your hydration needs. For example, if you weigh 130 pounds, drinking about 65 fluid ounces of water per day is a good rule of thumb.  

Since a typical single-use plastic bottle of water is just under 17 ounces, that’s nearly four bottles per day. Much plastic is headed to our landfills and oceans, but more later.  

The National Academies of Sciences is another organization that recommends the amount of water one should drink daily. It states that about 2.7 liters of water per day for women and 3.7 liters for men per day are about right. That would be about 5-6 bottles of water for women and 7-8 for men. 

Can Drinking Plenty of Water Help Me Lose Weight?

Drinking plenty of water can help you lose weight. But, of course, when combined with healthy eating and a healthy activity level, your chances of weight loss will increase.  

But what is “plenty of water”? Studies show that drinking a full glass of water before meals helps reduce your calorie intake because your stomach feels full, so you’re likely to eat less. One study showed that increasing plain water consumption by up to three cups a day might decrease daily calorie intake by as many as 205 calories. That has the potential to significantly reduce your calorie intake over time, resulting in more significant weight loss. 

In addition, it’s easy to mistake hunger pangs for thirst. If you’re hungry but have already eaten, you might be thirsty. Try downing a glass of water before heading for the refrigerator or pantry.  

Finally, drinking sufficient water helps keep your body from water retention, which can cause bloating, making you look heavier than you are.  

How Do I Know If I need to drink more water? 

There are numerous ways that your will body lets you know if you’re not getting enough water. A dry mouth is probably your first indication of mild dehydration. A headache is another sign.  

Suppose you are doing intense exercise or breastfeeding. If you aren’t drinking enough water, you may feel the signs of dehydration.   

Other signs that you’re not getting enough water include: 

  • Dark urine 
  • A lack of sweat despite being out on a hot day or engaging in heavy activity 
  • A craving for salty foods

How Can I Reduce My Use of Bottled Water?

How can you consume enough water bottles without polluting the planet with copious amounts of plastic? As previously mentioned, a person weighing 130 pounds must drink about four bottles of water a day. That adds up to 1,460 plastic water bottles annually, eventually ending up in landfills or oceans.  

While you’re bound to feel good about caring for your health, your self-esteem could take a hit just from the shame of increasing your carbon footprint. In addition, you’ll be inadvertently affecting your health by affecting the planet’s health.  

Not to worry. There are a few eco-friendly solutions that you can implement to help ensure your health and that of Mother Earth.  

Get a Reusable Water Bottle  

We recommend investing in a quality reusable water bottle that you can refill with fresh, cold water throughout the day.  

There are hundreds of options on the market, and depending on your preferences, you should be able to find one that perfectly suits your needs.  

Stainless steel insulated water bottles help keep water cold all day. Drinking cold water can increase resting energy expenditure by nearly 30% for up to an hour after consumption. That means you burn calories just by enjoying a cold drink of water. 

From flip-top caps or built-in straws to bottles with carrier handles and even built-in rotating hydration meters, the sky’s the limit when choosing the perfect water bottle.  

In fact, why not get a few? Keep a bottle by your bedside, one on your desk, and another in your car to refill daily.  

There are hundreds of water bottle brands out there that can help you stay eco-friendly and hydrated. 

Water Filtration System 

Installing a home water filtration system will improve your drinking water’s purity, taste, and smell. It can also lower the pH level of the water that you drink. The best part is that you always have clean, filtered water at your fingertips, allowing you to refill your eco-friendly water bottles throughout the day. 

You can choose a point-of-use system that places the filtration equipment underneath your sink, or you can go with a whole-house water filtration system so that your water is filtered and safe no matter where you’re getting it from.  

A water filtration system purifies water from contaminants and can soften it, eliminating the need for an additional water softening system. Some common contaminating chemicals in water may include chloramine, ammonia, fluoride, or pesticides.  

Recycle Plastic  

We all find ourselves compelled to buy bottled water from time to time. You may be running errands or traveling and need help to take your water from home.  

The happy news for our planet is that we can reuse plastic by doing our part to sort our trash and recycle plastic, paper, glass, and aluminum.

Stay Hydrated With Filtered Water in an Eco-Friendly Bottle 

Drinking too much water can cause hyponatremia (overhydration), so stick to the recommended amounts. Do your part for your body and planet by using a reusable water bottle and getting your water from a clean source, like a good water filtration system.  

Final Step  

Staying hydrated is more than just a daily routine; it’s a commitment to your health and well-being. Understanding your water needs and incorporating sustainable practices like reusable bottles contribute to your vitality and the planet’s health. Prioritize hydration as part of your lifestyle, just as you would with nutrition and exercise, to unlock its full benefits. Remember, minor changes lead to impactful results. So, raise a glass (or water bottle) to your health, and make every sip count!

How Many Tablespoons in a Cup? (Quick Guide)   

Accurate measurements are crucial to success in the kitchen. Whether baking a cake, whipping up a sauce, or experimenting with a new recipe, knowing how to convert measurements can make or break your dish. One of the most common conversion questions asked by home cooks and food enthusiasts is, “How many tablespoons are in a cup?”  

Spoiler alert—it’s 16 tablespoons in a US cup! But there’s more to learn; this guide will break it down. By the end, you’ll have clear answers and bonus tips for understanding other conversions that will take your cooking to a professional level.  

Why Knowing the Conversion Matters  

Understanding measurements is more than just a numbers game—it affects the outcome of your dish. Baking, for instance, is like science. A slight error in even a teaspoon of baking soda can throw off the texture or flavor of your cake entirely. For sauces, soups, or salads, correct measurements ensure ratios are balanced, delivering the dish that’s been envisioned.  

If you’re a food blogger or culinary enthusiast, knowing conversions clearly will also make your recipes accessible to a broader audience. Only some have access to advanced tools like digital scales, so cup-to-tablespoon conversions are practical and necessary.

What is a Tablespoon?

A tablespoon is a versatile unit of measurement used in the culinary world for both liquid and dry ingredients. In the United States, a tablespoon is commonly defined as 1/16 of a cup, equivalent to three teaspoons or approximately 14.79 milliliters. This standardized measure ensures recipe consistency and precision, allowing cooks to achieve the desired flavor and texture. Not only is it a primary tool for measuring ingredients like butter, sugar, and flour, but tablespoons are also essential when portioning out spices and seasonings. Whether you’re a novice in the kitchen or a seasoned chef, understanding what constitutes a tablespoon is fundamental to mastering the art of cooking.

What is a Cup?

A cup is a well-established unit of measurement commonly used in culinary practices to quantify liquid and dry ingredients. In the United States, a standard cup is defined as eight fluid ounces, which equates to approximately 237 milliliters. The concept of a cup as a measurement is deeply rooted in culinary traditions, serving as a baseline for many recipes. This standardized volume allows for precise replication of culinary creations, ensuring that each dish is consistently flavorful and balanced. Understanding the metric equivalent of a cup is also beneficial for those adapting recipes internationally. A cup is essential for anyone in the kitchen to measure various ingredients, from liquids like milk and broth to solids like flour and sugar. Becoming adept at using a cup ensures reliable results in everyday cooking and gourmet endeavors.

How Many Tablespoons Are in a Cup?  

The answer lies in the measurement system you’re using. Here, we’ll focus primarily on the US measurement system, which is most commonly used in recipes from America.  

Standard Conversion  

  • 1 US Cup = 16 tablespoons  

It’s that simple! This standard conversion is found in most American recipes, whether baking cookies or creating a caramel glaze.  

Metric Conversion (for Global Cooks)  

But hold on—things might be slightly different if you follow an international recipe. Not all countries measure a “cup” the same way. Here’s how the US cup compares to other “cups”:  

  • 1 Metric Cup (used in countries like Australia) = ~16.91 tablespoons  
  • 1 Imperial Cup (used in older UK recipes) = ~18.18 tablespoons  

When cooking internationally, always check which cup measurement system is referenced to avoid surprises.  

Breaking it Down Further  

Now that you know the basics, let’s break it into smaller measurements and scenarios you might encounter.  

Tablespoons in a Half Cup  

Half a cup is common in most recipes, especially for sugar, flour, or butter. Here’s the math:

  • ½ cup = 8 tablespoons  

Tablespoons in a Quarter Cup  

Need a smaller measurement?  

  • ¼ cup = 4 tablespoons  

Tablespoons in an Eighth Cup  

For specialty recipes or precise reductions:

  • ⅛ cup = 2 tablespoons  

Knowing these breakdowns by heart can help when tweaking or scaling a recipe up or down.  

Bonus Section: Tablespoons vs Teaspoons  

It helps to know how tablespoons relate to teaspoons, as both are commonly used. For reference:

  • 1 tablespoon = 3 teaspoons  
  • 1 US cup = 48 teaspoons  

This is especially useful when halving or doubling recipes where both teaspoons and tablespoons are needed.  

Tips for Measuring Accurately  

Now that you have the numbers, here are some practical tips for measuring precision.  

Level Off Dry Ingredients  

When measuring flour or sugar in tablespoons, use a flat edge, such as a knife, to level off the ingredients. Heaping measurements can yield inconsistent results.  

Use the Right Tools  

Invest in proper measuring tools. Dry measuring cups are used for solid ingredients, while liquid measuring cups come with spouts to measure fluids more accurately. Use standard measuring spoons for consistency when measuring tablespoons.  

Double-Check When Converting  

If substituting ingredients or working from memory, double-check conversions to avoid trouble. For example, while switching a cup of liquid to tablespoons may seem easy, minor numerical errors can snowball.  

Quick Conversion Chart  

Here’s a handy cheat sheet for your kitchen to keep conversions at your fingertips—perfect for sticking on the fridge!  

This chart is handy if you’re multitasking while cooking or baking and need conversions at a glance!  

Expand Your Mastery  

While understanding tablespoons in a cup is vital, continue. Explore other conversions and cooking math. For example:

  • Due to density differences, 1 cup of flour weighs differently from 1 cup of sugar.  
  • Liquids like milk and oil tend to measure precisely in fluid ounces, but semi-liquids like yogurt can vary.  

Investing in a digital scale is a game-changer for those who want even more precision. Measuring by grams or ounces gives you the same results every time, irrespective of how ingredients are packed or heaped.  

Wrapping It Up  

Whether brewing the perfect coffee, baking a decadent cake, or crafting a foodie blog post, knowing basic conversions like “how many tablespoons in a cup” is indispensable. With 16 tablespoons in every US cup, you’ve got one of the most versatile culinary tools in your arsenal. Keep this knowledge handy to save time, reduce errors, and impress in the kitchen.  

If you’re inspired to learn more tips like this, subscribe to our newsletter or check out our collection of easy-to-follow recipes for any skill level. Happy cooking!  

Wet vs. Dry Tablespoons

It’s crucial to differentiate between wet and dry measurements when measuring ingredients to achieve consistent results. While a tablespoon remains a tablespoon in volume, how you handle ingredients like fluids or solids can impact the outcome.

Wet Ingredients

For wet ingredients like milk, oil, or honey, it’s best to use standard liquid measuring tools, which are typically straightforward and feature spouts for pouring. These tools allow you to measure liquids accurately at eye level, preventing spills and ensuring precision. When using tablespoons for wet ingredients, fill them and level off, especially if measuring any viscous liquid that could dome.

Dry Ingredients

Dry ingredients such as flour, sugar, or spices require a different approach. Use a standard set of measuring spoons specifically designed for dry ingredients. To measure accurately, fill the tablespoon and then level it off with a flat edge to remove excess. Avoid packing the ingredients unless directed, as this can lead to discrepancies and affect the texture and taste of your dish.

By understanding the nuances of wet vs. dry tablespoon measurements, you can guarantee accuracy in your cooking or baking endeavors. This separation of techniques enhances your results and enriches your overall culinary skills.

Conclusion

Mastering measurement conversions and techniques is essential in any kitchen, whether for casual cooking or professional food blogging. By understanding the distinctions between wet and dry measurements and having a firm grasp on converting tablespoons to cups and other units, you lay the foundation for creating consistent, delicious outcomes every time. With these principles at your fingertips, experimentation becomes a thrilling adventure rather than a daunting task. Leveraging accurate measurement practices enhances your cooking experience and elevates the reliability and appeal of your culinary creations. Embrace these skills, and let them inspire confidence and creativity in your kitchen journeys.